
Friday, April 30, 2010
2 Recipe #105: ¡Holy Guacamole! :)


Here's a guac recipe to go with any of the many salsa recipes on this blog. Just add chips & some other "fixin's" and you're all set. :)

¡Holy Guacamole!
2 scallions, sliced crosswise into thin rounds
2 tsp. jalapeño (for medium heat, or 1 tsp. if you prefer it very mild)
2 Tbsp. cilantro, finely minced
1/8 tsp. Tabasco red hot sauce (or substitute green jalapeño pepper sauce, if you prefer less heat)
1 tsp. Mexican-style chili powder
1 tsp. dried Mexican oregano leaves (if unavailable, use regular oregano)
1/2 tsp. dried epazote leaves (if unavailable, you can just omit)
Directions: Scoop out avocado flesh into a large bowl and mash with a fork. Do not pulverize avocado; just mash it enough so that it's blended but still retains its chunky texture. Add all other ingredients, in the order they are listed above -- scallions, jalapeño, cilantro, Tabasco hot sauce, lime & lemon juice, & all dry ground spices -- mixing well after each addition. Serve immediately.
Yield: 4-6 servings.
Optional Ingredients: 1 large, vine-ripened tomato, diced into 1/4" cubes. Please note that if you're adding the tomatoes, do not add them until you are ready to serve. Otherwise, the guac won't keep as long. I would suggest placing the tomatoes in a small serving bowl & giving guests the option to add the tomato to their guac as they please.
Serving Suggestions: Serve with baked tortilla chips & salsa. Also makes a great addition to a sandwich, or a nice side for fish, chicken, or beef.
Chef's Notes: When preparing avocado, use a large spoon to scoop out the avocado flesh.
As many of you probably already know, avocado flesh oxidizes when it makes contact with air. Lemon/lime juice will help delay this process, but if you are storing the guac overnight, there might be some discoloration the next day. This is not the end of the world; the guac will still taste the same. :) Just mix the guac a bit, which should improve the color somewhat. This is why I personally prefer to make guac within a few minutes of when I plan to serve it. :)
Also, dried epazote leaves can be purchased at Latin American grocery stores, or online. One good online resource for epazote is Penzey's Spices.
Thursday, April 29, 2010
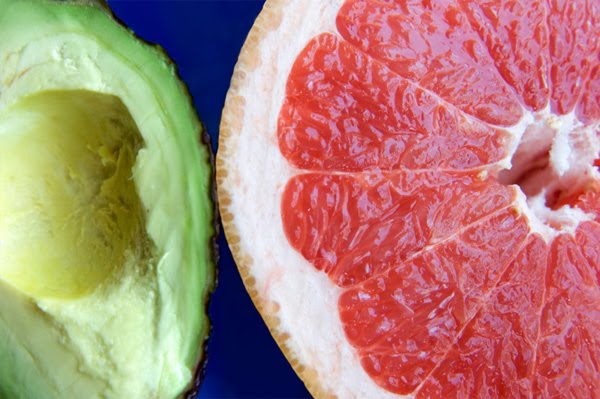
0 Recipe #104: Grapefruit Salsa
Earlier this month, my mother sent us another box of Florida ruby-red grapefruits as a present. It was a very pleasant & thoughtful surprise to receive in the mail. :) Thanks, Mom! We really appreciate it!
So it's no surprise that we've been eating grapefruits like they've been going out of style. :) Sure, I love eating them with a spoon or in wedges, but I thought it might be fun to do something else with them instead of just eating them in their unadorned state. And so, I created this recipe....
Ingredients:
1/2 large, ruby-red grapefruit, deseeded, peeled, and separated into wedges
3 medium-sized, vine-ripened tomatoes, diced
1 ripe avocado, peeled, pitted, and diced into cubic 1/2" pieces
1/2 red onion, diced into cubic 1/2" pieces
1/2 tsp. jalepeño pepper, finely minced
1/4 c. cilantro, finely chopped
1 Tbsp. distilled white vinegar
1 Tbsp. freshly squeezed lime juice
1 tsp. ground cumin
1 tsp. dried oregano leaves
salt & pepper, to taste
Directions: Mix all of the ingredients together & refrigerate for 1-3 hours before serving, to allow ingredients to marinate. Serve & enjoy!
Yield: About 3 cups.
Wednesday, April 28, 2010
0 Recipe #103: Ginger Sesame Beef with Scallions

Ingredients:
8 oz. beef (sirloin or flank cut)
1 Tbsp. sesame oil
1 Tbsp. soy sauce
1 Tbsp. rice wine vinegar
1/2 Tbsp. honey
4 Tbsp. garlic, peeled & finely minced (about 4 large cloves)
1 Tbsp. ginger, peeled & finely minced (about 1" piece)
1/2 tsp. green chili (for mild piquancy, use jalepeño; for more heat, use serrano)
3/4 c. (shiitaki or cremini) mushrooms, sliced or diced (whichever you prefer)
2 Tbsp. fresh parsley, finely minced
2 c. water (or more as needed)
1/2 c. scallions (about 2 whole scallions)
sesame seeds (for garnish)
Directions: Cut beef into small strips. Tenderize beef: Place beef on a cutting board, cover with plastic wrap, & then, smash meat with a meat mallet until it's about 1/8" thick, the thinner the better. Apply a powdered meat tenderizer to its surface, and then proceed to marinate beef: Add all ingredients -- except for water, scallions, & sesame seeds -- to a Ziploc bag and refrigerate for at least an hour. Sauté beef marinade ingredients in a large (i.e., 12" or larger) nonstick sauté pan on medium-high heat. As beef begins to brown, deglaze occasionally with water, pouring about 1/2 c. water into the pan at a time. Each time, allow the liquid to cook down completely before adding more water. Brown beef on both sides. In the last few minutes of cooking, add the scallions, which should be cooked until slightly soft but not browned. (Scallions should retain their color; if they've changed color, then you know you've cooked them for too long.) Remove from heat & divide into two servings. Sprinkle with sesame seeds & serve.
Serving Suggestions: Serve with jasmine or (brown) basmati rice, preceded by a small Asian-style side salad (lettuce, cabbage, carrots, radishes, cucumbers, etc.) drizzled with ginger salad dressing. Or serve with steamed broccoli & rice.
Yield: 2 servings.
2 Recipe #102: Wild Mushroom Quinoa Risotto with Fresh Herbs & Hazelnuts
As you might recall, earlier this month I created a recipe for wild mushroom risotto with black truffle oil. It turned out so well that I decided to create another wild mushroom risotto recipe, this time using quinoa instead of superfino arborio rice. As one of the touted "super foods," quinoa is an exceptionally nutritious grain, so it only made sense to try to create a risotto recipe that would be even healthier than the last one I'd created. What can I say?! I like a good challenge. :)
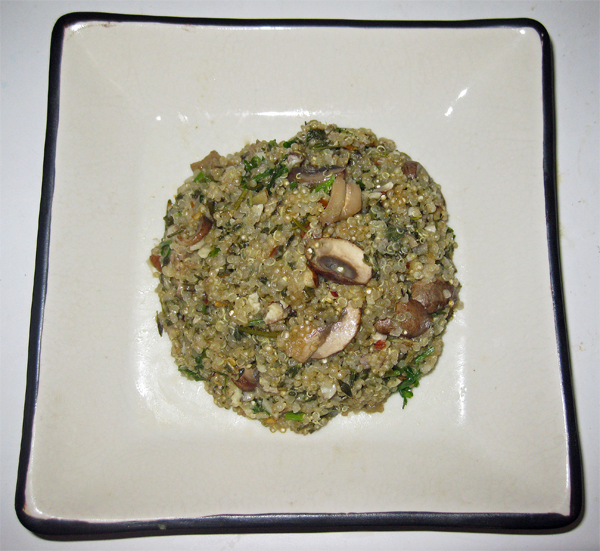
Wild Mushroom Quinoa Risotto with Fresh Herbs & Hazelnuts
Ingredients:
2 tsp. extra virgin olive oil
2 tsp. fresh garlic, peeled & finely minced (about 2 medium-sized garlic cloves)
1/2 c. wild mushrooms (cremini, porcini, &/or shiitake), washed/cleaned & sliced
1/4 c. (uncooked) quinoa
2-3 c. water or vegetable stock (or more as needed)
1 1/2 Tbsp. fresh sorrel, finely minced
1 Tbsp. fresh thyme leaves (about 10 large sprigs)
1/2 Tbsp. fresh rosemary leaves, finely minced (about 1 sprig)
1/2 Tbsp. fresh oregano leaves, finely minced (about 2 sprigs)
1 Tbsp. fresh parsley, finely minced
2 tsp. ground (toasted) hazelnuts
1/8 tsp. ground nutmeg
small pinch red chili pepper flakes (less than 1/8 tsp.)
ground black pepper, to taste (optional)
small pinch salt (optional)
3 Tbsp. grated Parmesan cheese (heaping 1/3 c.)
Directions: Sauté garlic in olive oil on low heat until soft & translucent but not browned. Stir frequently. Add mushrooms & hazelnuts, & cook for a minute or so. Then mix in quinoa, stirring continually for about 30 seconds. Watch pan carefully so quinoa doesn't brown or burn. (This step is particularly important, as it cooks off the quinoa's starchy coating & prevents the grains from getting sticky & mushy when the liquid ingredients are added. Quinoa should be firm & slightly crispy, but not browned.) Using a liquid measuring cup, add water/stock so that it just barely covers quinoa, incorporating only a cup at a time, stirring constantly, until liquid is absorbed (about 1 minute). Allow each cup to be absorbed before adding the next. Add all fresh & dried herbs & spices, & mix together thoroughly. Cook until quinoa is al dente, about 10-15 minutes. Quinoa mixture should be creamy but still firm. When ready, remove from heat. Stir in Parmesan cheese, mixing thoroughly to evenly distribute ingredients. Garnish each portion with a sprig of parsley, & serve immediately.
Yield: 1 serving.

Recommended Equipment: I like to use a nice deep sauté pan like the Calphalon One Nonstick 5-Quart Sauté Pan with Glass Lid. . This pan works really nicely & is the perfect dimensions for risotto, i.e., nice & deep, but wide enough to accomodate all the ingredients, without them stacking on top of each other. It's particularly important in this dish that the ingredients have enough room to spread out in the pain; otherwise the ingredients will steam versus sauté.
Tuesday, April 27, 2010
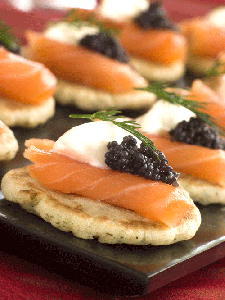
0 Recipe #101: Blini with Caviar & Smoked Salmon
Often called the "royal Russian breakfast," a meal of caviar served with blini is one of the consummate Russian ways of eating caviar. :) Blini -- fluffy, miniature Russian pancakes -- are traditionally made with buckwheat flour & a leavening agent like yeast (or baking powder). They are the perfect complement to caviar & smoked salmon, & are also typically served with crème fraîche, although for obvious health-related reasons (i.e., crème fraîche is 28% butterfat & has twice the amount of calories as regular, full-fat sour cream!), this recipe calls for a much healthier alternative -- lowfat sour cream or nonfat yoghurt. :) The dish still tastes rich & amazing, but does so without sending your arteries into a state of shock. :)
 Blini with Caviar & Smoked Salmon
Batter Ingredients:
1 tsp. active dry yeast
1/4 c. lukewarm (110-115°F) water
2 tsp. brown sugar
2 Tbsp. skim milk
2 Tbsp. buttermilk
2 Tbsp. melted butter
1 large egg, separated into yolk & whites, at room temperature
1 pinch confectioner's sugar
1/4 c. unbleached, all-purpose flour
1/4 c. buckwheat flour (if unavailable, just use unbleached, all purpose flour)
1/8 tsp. salt
1/2 Tbsp. olive oil (for cooking)
Filling Ingredients:
2 tsp. caviar (use a unendangered fish roe like lumpfish, hackleback, or salmon, etc.)
1/4 lb. smoked salmon, thinly-sliced with skin & blood vein (i.e., brown fleshy underside) removed, at room temperature
2-3 Tbsp. low-fat sour cream (or nonfat yoghurt)
Egg Mousse Ingredients:
2 large eggs, hard-boiled & finely chopped
2 Tbsp + 1 tsp. scallions, finely chopped (or, for a bolder, more potent flavor, substitute red onion)
1/8 tsp. ground black pepper
1/8 tsp. salt
2 tsp. lemon juice
1 tsp. lemon zest
2 Tbsp. low-fat sour cream (or nonfat yoghurt)
1/2 tsp. fresh chives, finely chopped
 Directions: In a custard dish, add yeast to lukewarm (i.e., tepid but not scalding hot) water & sugar, & give it a gentle stir with a spoon to allow mixture to dissolve. Let yeast proof for about 5 minutes. Live yeast should start to bubble & foam after a few minutes; if nothing happens after 5 minutes, the yeast is dead & you'll need to start over with fresh yeast. (Please read these instructions if you need guidance on how to properly proof yeast.)
While yeast is proofing, make the batter: In a separate bowl, mix together liquid ingredients for batter: milk, buttermilk, melted butter, & egg yolk. Put damp towel underneath mixing bowl to keep it still while you work. Gently fold in yeast mixture, and then whisk in flour & salt until batter is thin & smooth. Cover bowl with plastic wrap and let mixture rise in a warm place for 1 hour. (Do not let batter rise for longer than an hour, or batter will taste fermented.)
.jpg) While batter is rising, make egg mousse: Toss all ingredients into a food processor, blend until smooth, pour into a serving bowl, & set aside. Please note that egg mousse can be made a day in advance & then chilled in the fridge, covered. (If you'll be refrigerating egg mousse, be sure to bring to room temperature before serving.)
While batter is rising, make egg mousse: Toss all ingredients into a food processor, blend until smooth, pour into a serving bowl, & set aside. Please note that egg mousse can be made a day in advance & then chilled in the fridge, covered. (If you'll be refrigerating egg mousse, be sure to bring to room temperature before serving.)
When batter has only 5 minutes left to rise, prep the egg whites: In a separate, sparkling clean mixing bowl, whip/whisk the egg whites with an electric mixer on the highest speed until still peaks form. (Egg whites should be stiff & glossy at this stage, with peak tips that stand straight when the beaters are lifted.) Be sure to wait to add a pinch of confectioner's sugar until the very end of the procedure; otherwise, it'll take twice as long for the eggs to foam. When batter has finished rising, gently fold egg whites into batter.
.jpg) Spray a 12" nonstick skillet with olive oil disperser like Misto, etc.. (Or, if unavailable, use a brush.) Turn on heat to medium-high. (Be sure to use a flat, wide pan versus a curved one, which'll provide more cooking surface area for the blini.) Working in batches of 6, drop 1 level tablespoon of batter per blini into pan, to form a 3" pancake. As soon as the blini start to bubble in a uniform fashion & the undersides turn golden brown (about 20-30 seconds), slide a spatula carefully underneath the blini & flip over (just once) & cook about 20-30 seconds more. Transfer the first batch of cooked blini onto a heatproof plate; cover to keep them warm. Repeat with remaining batter and continue until all the batter is used. (You can also make blini in advance & warm in the oven before serving, although I prefer them fresh out of the pan.)
Spray a 12" nonstick skillet with olive oil disperser like Misto, etc.. (Or, if unavailable, use a brush.) Turn on heat to medium-high. (Be sure to use a flat, wide pan versus a curved one, which'll provide more cooking surface area for the blini.) Working in batches of 6, drop 1 level tablespoon of batter per blini into pan, to form a 3" pancake. As soon as the blini start to bubble in a uniform fashion & the undersides turn golden brown (about 20-30 seconds), slide a spatula carefully underneath the blini & flip over (just once) & cook about 20-30 seconds more. Transfer the first batch of cooked blini onto a heatproof plate; cover to keep them warm. Repeat with remaining batter and continue until all the batter is used. (You can also make blini in advance & warm in the oven before serving, although I prefer them fresh out of the pan.)
To serve, top each warm blini with a small dollop of sour cream, a sliver of smoked salmon (folded onto itself), a dime-sized portion of caviar, & a pinch of chives (or dill). On each plate, place a small portion of egg mousse on the side for dipping. Serve immediately.
Chef's Notes: Be sure not to touch egg whites with your hands & also to use a dry, extremely clean mixing bowl & beaters, both of which can affect the whipping procedure.
Serve caviar with non-metallic (i.e., ceramic/porcelain, plastic, etc.) spoon. Although mother of pearl spoons are considered to be the most traditional serving utensil, I used a Chinese soup spoon, which will work well in a pinch. :)
 Serving Suggestions: Pair with chilled Champagne, iced/frozen vodka, or a clean-tasting, non-alcoholic beverage like chilled white grape juice.
Yield: 15-18 blini.
Saturday, April 24, 2010
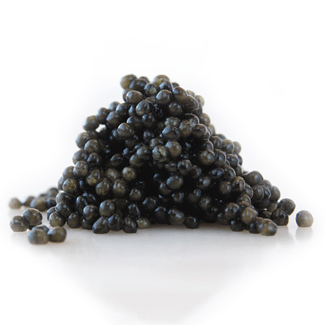
0 Eating Caviar the Russian Way, Part 2
 Nutritional Value: You might be surprised to know that caviar is actually healthy for you. Of course, it all depends on how you prepare the caviar, (i.e., what you add to it, if anything), & how much you eat of it. :) Caviar manufacturers prepare it with very little processing, so it still remains a very natural food. It's also very high in vitamins and minerals (i.e., a spoonful of caviar fulfills the adult recommended daily allowance for vitamin B-12), and is relatively low in calories. It does, however, contain significant amounts of cholesterol and sodium. (To view a complete nutritional profile of caviar, click here.) As with anything else, caviar -- even after weighing its nutritional pros and cons -- is probably best eaten in moderation. :) As it's typically eaten in small quantities either as a garnish or topping for hors d'œuvres, there's already a bit of built-in portion control with its method of preparation/serving as well. :)
  Caviar purists believe that, due to its distinct flavor, premium caviar is best eaten by itself, unadorned, and that any additions would only interfere with its flavor & the overall eating experience. (It's the "less is more" approach. ;) ) Very often, it's placed on a bed of crushed ice, with the jar lid facing upwards next to it (for easy identification), & then eaten straight from the tin. The logic of caviar connoisseurs is that the better the caviar, the less need there is to garnish it, because the high quality stuff can stand on its own. :) However, it would seem a shame to miss out on the pleasure of eating dishes like Blini With Caviar and Smoked Salmon or Pan-Seared Scallops in a Caviar-Champagne Sauce. :)
 When eaten plain, it is sometimes followed by a flute of chilled dry Champagne or frozen vodka. The fairly neutral taste of these beverages makes them a subtle, complementary pairing for the clean flavors of the caviar.
 IMPORTANT: Please note, caviar should never be cooked or frozen (!), as this would either burst the eggs &/or toughen the exterior of the roe, thereby ruining the caviar. If a recipe calls for caviar in a cooked dish, the caviar should be added in at the last minute, but only after the cooked dish has first been removed from its heat source & then allowed to cook for a few minutes.
 Handling and Serving Caviar: When handling caviar, be sure to use non-metallic serving utensils and bowls. Mother of Pearl or gold spoons are traditional, but ceramic & glass will also work, as well as bone, horn, & tortoise shell. Even though wood or plastic spoons are probably a measure of last resort, they are still preferable to metal, which will easily oxidize, and thus alter, the caviar's flavor. Metal, whether stainless steel or silver, will impart an unpleasant metallic taste to the caviar.
[On that note, one thing that's never made sense to me is how caviar can be stored in metal tins, and yet, remain unadulterated. The only explanation that seems to make sense is that the tins are often vacuum sealed, thus reducing or eliminating the presence of oxygen. However, once the tin is opened, that still doesn't explain how people are able to eat it straight from an open tin without oxidizing the metal and thereby, altering the caviar. Anyone know the answer to this question? I've looked everywhere but can't seem to find the answer. Why hasn't anyone (online) addressed this rather obvious paradox before?]
Caviar should be served chilled. For the best results, remove caviar jar(s) from the refrigerator 10-15 minutes before serving, and only open (the lid) immediately before consumption. To serve, place the caviar tin on a bed of crushed ice, which not only looks elegant, but also serves a practical purpose as well: It will help to keep the fragile eggs nice and fresh. Or, if you're not planning to serve the caviar in its tin, I recommend that you transfer it to a non-metallic bowl nested inside a large bowl filled with crushed ice immediately before serving.
So, the caviar's been served and now it's time to eat it. :) The recommended way to do this is to burst the eggs with the tip of your tongue, which will release the full flavor of the caviar. Sit back, relax, and savor it slowly. This way, you can take your time and enjoy the experience. :)
Promptly cover and refrigerate any leftovers and be sure to use them within 1-2 days. To reduce the amount of air exposure, any tins containing leftover caviar should first be covered with plastic wrap before reaffixing their lids: First, gently level out the surface of the caviar and then lightly press a sheet of plastic wrap directly on top before covering it with the lid and placing it back in the refrigerator. Turn the tin over each day so that the oil reaches all of the eggs.
Determining Serving Sizes: Since caviar has an extremely short shelf life (and even more so for high-quality caviar), only buy as much caviar as you plan to serve. To calculate how much caviar you'll need, consider that there are approximately 8 to 10 (1/2 tsp.) servings per ounce of caviar. A 1/2 tsp. is about the amount you'd use to top a single appetizer with multiple garnishes. If caviar's being served by itself, or with crackers or toast points, a 2 oz. jar will serve about 4 people. For party canapés, this same size jar will serve 8 people.
Shelf Life and Storage Methods: Because fresh caviar is extremely perishable, its shelf life is limited. Once its imported, repackaged, and distributed to stores, caviar's shelf life can range from around 3-4 weeks to 6-8 months in its unopened, refrigerated state, depending upon the particular processing method used and the amount of time that's elapsed between processing and shipment. (For more specifics on shelf life for each processing method, please see the previous post, which covers this topic at length.) So, be sure to inquire about about processing/packaging dates before you buy. This information isn't always listed on the tin.
Do not open caviar until needed. Opened caviar should always be refrigerated but never be frozen! Freezing destroys the roe membrane & alters the flavor. Once opened, it's good for about 2-3 days and that's only if it's refrigerated at an ideal temperature of 30°F, (although a slight variance of 2 degrees in either direction is acceptable, i.e., a range of 28-32°F). Storing caviar at the proper temperature will ensure that the "berries" won't burst. Try storing caviar in the back part of your refrigerator, which is usually the coldest part.
How to Select Good Quality Caviar: The quality of caviar depends on the origin and the type of preparation, as well as the care taken during the preparation stage. Good caviar should taste neither fishy nor overly salty. Look for shiny, fine-grained egg globules. Be sure to read the label printed on the side of the tin of the caviar you purchase. The label will provide information such as the number of tins filled with roe from the same fish, the size and color classification of its roe -- light (000), medium (00), or dark (0), its method of processing, and whether or not any dye has been added. (Some caviars are dyed a uniform color; be sure to gently rinse these before using them in a recipe.)
And thus concludes the second and final installment in the "caviar lecture" series. LOL.
For even more information on caviar, see this rather extensive glossary for "all that you ever wanted to know about caviar but were afraid to ask." ;)
Those of you who've been patiently waiting for the arrival of the aforementioned caviar recipes will be happy to know that the Blini With Caviar and Smoked Salmon recipe is up next. :)
Friday, April 23, 2010
0 Eating Caviar the Russian Way, Part 1
It is my hope that this background information will not only help to make you feel more at home in the kitchen when it comes to preparing the corresponding recipes, but will also provide useful insights to help you practice & enjoy the experience of responsible caviar consumption.
The four varieties of "true" caviar, (i.e., sturgeon roe), are Beluga, Osetra, Sevruga, and Sterlet, (the last of which is very rare & no longer sold commercially). Each type of caviar is named after the species of sturgeon that produces them.
While there are many other types of fish roe commercially marketed as "caviar," only the fish roe of sturgeon may technically be called "caviar," regardless of its origins -- i.e., the United States, Russia, Iran, or anywhere else. When the word "caviar" is used on its own, it implies that the roe is from sturgeon. All other classifications of "caviar" are really caviar substitutes, and are typically referred to as "fish roe" or "fish roe caviar." In these instances, the word "caviar" will typically be preceded by another term (like "lumpfish" or "salmon," etc.) to indicate its true origins. When in doubt, read the fine print on the label. :)
 Sustainability Although caviar connoisseurs consider sturgeon roe to be premium, "true" caviar, this thinking has been revised by many, particularly as sturgeon roe has now become extremely rare, due to dwindling populations caused by overfishing (almost to extinction!), rampant poaching, pollution, & interference with their natural habitat. :(
Really, there's no need to kill off an entire species (or more accurately put, any of the remaining species!) just for the sake of satisfying a few fleeting moments of culinary ecstasy. That is just sheer stupidity & short-sighted gluttony. Remember the parable about the goose that laid the golden eggs? Now just keep that image in your brain but instead replace the word "goose" with the word "fish." ;)
Due to sustainability concerns, I'd recommend consuming other (i.e., read "non-endangered"!) types of caviar whenever possible. There are several decent (not to mention, far less exorbitantly priced!) kinds of caviar that come from other types of fish. For example, hackleback, Choupique (a.k.a. bowfin), lumpfish, American Golden (a.k.a. whitefish roe), salmon, trout, avruga (a.k.a. herring roe), and American caviar (from American lake sturgeon) are just a small list of some of the currently available alternatives. (Paddlefish caviar is often cited as an "alternative" caviar, but since it's now been added to the list of "vulnerable" species, it's probably best to either limit or altogether cease your consumption of this variety or better yet, switch to a sustainable variety instead.)

Of the three remaining types of commercially sold, "true" caviar, Beluga is the generally considered to be the best. However, due to its high demand over the years, overfishing has put undue strain upon the species, also making it one of the rarest, and thus, most expensive types of caviar. Also compounding the issue is Beluga's slow maturation cycle: In order to produce eggs, the Beluga must first reach adulthood, which takes at least 20 years! In an effort to protect this endangered species, the United States Fish and Wildlife Service, as of 2005, has banned the import of Beluga caviar from the Caspian Sea as well as the entire Black Sea basin. At present, it is illegal to import Beluga caviar into the US and also to transport any existing Beluga caviar currently located in the US across state lines.
Another smart, albeit admittedly less noble, reason to switch is this: Your wallet. :) Or rather, what'll be left of it after you pay a king's ransom for a microscopically small tin of overpriced fish eggs. ;) Of course, the rarer the caviar, the more expensive it is. Yet another compelling reason to switch, particularly in the current economy. :)
 For example, let's consider the price tag of the rarest variety of caviar in the world, Golden Almas, a highly-prized, white Osetra caviar harvested from the endangered albino sturgeon, which make their home in the Caspian sea & are, on average 60-100+ years of age! (The older the sturgeon, the subtler & creamier the flavor of its roe. However, if people keep eating it, it won't be around to enjoy for much longer.)
In its most extravagant format, this particular brand of white Osetra caviar is packaged in a 24K gold tin which costs $25,000 USD per 35 oz., or $710 an ounce (!). At that astronomic price, it's even more expensive than gold itself, which is about $600 per ounce! That's a rather hefty price tag for most mere mortals. Quite fittingly, "almas" is the Persian word for "diamonds." ;)
(White Osetra caviar was once considered to be so luxurious that it was reserved only for tsars and shahs. This is why white Osetra caviar also often referred to as 'Imperial' or 'Royal' caviar. Strangely enough, it was also once eaten by Russian peasants well before it became such an exclusive commodity.)
And finally, here's yet another reason to make the switch to sustainable caviar: Your health. :) Consider this: Contaminated water has been a huge problem in the Caspian Sea, where a large majority of wild sturgeon live. Not only do these fish swim in polluted waters, but they eat food from those waters as well. And, due to the fact that all species of wild sturgeon have remain unchanged since their beginnings, their immune systems have not adapted to protect them against the pollutants of modern industry. Because they have not evolved and thus, cannot fight off the ravages of pollution, think of what that means for you if you were to eat wild sturgeon roe.
Now consider the advantages of eating sustainable farmed caviar: Unlike wild sturgeon, farmed sturgeon swim in clean artesian well water and are fed all-natural feed.
Also, equally important is the following factor: Farmed sturgeon are not killed in order to extract their caviar. Instead, the eggs are removed in a C-section like fashion, the wound is stitched up to keep the fish alive, and then the fish is then returned to the water. This way, the sturgeon population doesn't have to be endangered in the process, and the female fish population can continue to produce more roe during their lifetime. Contrast this to the historical practices of commercial wild sturgeon fishermen, who stun the fish by clubbing its head and extracting the ovaries. The wild sturgeon is basically clubbed to death in order to obtain their roe. Once the roe is extracted, that's one less female fish to continue the cycle of life for the wild sturgeon population.
As you can see, sound and humane ecological practices will help ensure the survival of future generations of sturgeon, and thus, allow us to continue to enjoy their roe as well. :)
Processing and Packaging Methods: Ever wonder how caviar is processed? Here's the basic method: The caviar maker, or ikrjanschik in Russian, takes a large sac of roe and runs it over a very fine mesh screen that separates the eggs into separate pieces. The eggs then fall into a large bowl, whereupon the caviar maker adds precise amounts of pure sea salt (and sometimes other ingredients as well). (Salt is added to prevent freezing. It's used both as a preservative and as a curing agent.) The caviar is then graded and packed into 4 pound tins. Importers will then repackage these tins into smaller amounts, which are typically around 1 oz. in size. Beluga caviar is always packaged in blue tins, Osetra in yellow, and Sevruga in red. Other types of fish roe are typically packaged in glass jars.
The above steps must be done swiftly and gingerly, both to maintain freshness and protect the fragile nature of the eggs. It's a painstaking process, which requires a lot of skill and many years of experience. This is why a minimum of 10-15 years of apprenticeship is required before an ikrjanschik is allowed to process caviar on his own.
There are four (4) different caviar processing methods:
As you can see, when it comes to caviar, there's generally a trade-off between taste and shelf-life. ;) Therein lies the paradox: Less salt means better flavor but faster spoilage and higher prices, while more salt means slower spoilage and comparatively lower prices but a lower caliber flavor. As you can see, the amount of salt added to caviar is often inversely proportion to its overall quality.
OK, that's probably enough information to absorb for one post. :) Part 2 will be posted next....
Thursday, April 22, 2010
0 Recipe #100: Panang Curry (Quinoa, Tofu, & Tomatoes in a Lemongrass-Ginger-Garlic-Basil Sauce)
Recipe #100 is here at last!!!!!
Panang curry (แกงแพนง) has the most wonderful, aroma. Today, I as I was making it for lunch, it filled up the entire kitchen with its heady scent. My stomach growled in response, & suddenly, I began to cook a little bit faster. ;)
This particular recipe is fairly true to its traditional Thai roots, with the exception of the quinoa, which gives the dish a little twist. Of course, this blog wouldn't be this blog without its little twists & turns. ;)

1 Tbsp. garlic, peeled & finely minced (about 2 large garlic cloves)
1 shallot, peeled & finely minced
2 stalks fresh lemongrass, sliced crosswise into small rounds (dried will also work)
1-2 large kaffir lime leaves, center rib removed & finely minced (optional)
1/2 tsp. galangal root, cut into matchstick-sized pieces (optional)
1 tsp. rice wine vinegar
1 tsp. soy sauce
2 tsp. sesame seed oil
1/4 tsp. honey
2 tsp. freshly-squeezed lime juice
1/2 tsp. lime zest
1/2 tsp. sea salt (or, to taste)
1/2 tsp. ground cumin (or you can also use toasted cumin seeds)
1/8 tsp. red chili pepper flakes
1/2 c. fresh coconut juice (reserved from a fresh coconut)
1/2 c. silken tofu, diced into 1/2" cubes
1 whole scallion, sliced crosswise into small rounds
1/4 c. fresh cilantro, finely minced
Directions: Prepare curry paste by mashing paste ingredients into oblivion with a mortar & pestle. If this is too Paleolithic for you, then toss everything into a food processor instead, & pulse until smooth. Set aside.
Wash quinoa grains to remove starchy coating. To do this, place the quinoa grains in a small bowl, fill the bowl with just enough water to cover the grains, let them soak for a few minutes, & then stir them a bit with a spoon (or clean hands). Drain the water, & repeat a few more times until the water is no longer cloudy.
Next cook quinoa in water & coconut juice in a small sauce pot on low heat. About 5 minutes into cooking, add tomatoes, tofu, scallion, basil (or mint), & fresh cilantro, & gently stir to combine ingredients. Cook another 5-7 minutes. (If necessary, add more water to the pan during the cooking process.) Remove from heat, let quinoa mixture stand for 5 minutes, & then fluff. While mixture is resting, sprinkle chopped scallions on top & then prepare peanuts: Either crush them (with a mortar & pestle) or grind them (in a food processor or spice/coffee grinder) & then toast. Transfer ingredients to plate, sprinkle crushed/ground peanuts on top, then garnish with a sprig of cilantro, & serve. Enjoy!
Chef's Notes: Of course, if you'd like, you can always substitute beef or chicken for the tofu.
Yield: 1-2 servings. (Recipe can easily be double or quadrupled, etc., to accommodate more diners.)
1 Recipe #99: Sautéed Daikon Radish on a Bed of Wilted Greens
Cooked radishes have a totally different flavor & consistency when they're cooked. Gone is the sharp, bitey flavor, which has been replaced by a surprisingly mellow one. The daikon radish in particular, tastes really wonderful when complimented by other greens and, believe it or not, milk-based products, because they provide the perfect gentle foundation and also tremendously enhance the dish's overall flavor.
Did you know that, just like beet greens, daikon radish greens are also edible?! The daikon radish greens themselves have a peppery flavor that's similar to arugula, but after they've been cooked, they taste a lot like spinach. :)
This works out quite well; because not only can use find creative uses for the greens, but it also means less kitchen waste. As I've mentioned before, I try to use as many parts of a vegetable (or fruit!) as humanly possible, if I can at all avoid it. My attitude is similar to historic Native American attitudes towards the buffalo; they found a use for every part, and let nothing go to waste.
Anyhow, hope you will enjoy this unique spin on the daikon radish & its greens.

Ingredients:
1 Tbsp. extra virgin olive oil
2 Tbsp. garlic, peeled & finely minced (about 3 large garlic cloves)
1 Tbsp. shallot, peeled & finely minced (about 1 large shallot)
1 c. daikon radish, peeled & sliced crosswise into paper-thin rounds (about 1 large radish)
2 c. daikon greens, finely chopped crosswise into narrow strips
1/4 c. fresh sorrel, finely minced
2 Tbsp. fresh basil, finely chopped crosswise into narrow strips
1 Tbsp. fresh thyme (about 10 sprigs)
1 c. water
1/2 tsp. ground nutmeg
1 Tbsp. butter
salt, to taste
pepper, to taste
2 Tbsp. low-fat sour cream
Parmesan cheese, grated (for garnish)
Directions: Saute garlic & shallot in olive oil on low heat, & cook until tender (about 30 seconds). Add all other ingredients, except the sour cream & Parmesan cheese, and cook until liquid has almost completely evaporated. Be sure to cook the ingredients on low-heat, as you want to blanch the greens, so that they retain their bright green color. Taste-test a radish (allow it to cool first so you don't burn your mouth!); it should be pliable but still retain a bit of its crunch. When ready, remove from heat. Allow to cool a bit, mix in sour cream, stir thoroughly, garnish with Parmesan cheese, & serve.
Chef's Notes: Use a vegetable peeler to slice the radishes paper-thin; this is the best way to achieve this effect. It's important that the radishes are very thin, because they need to cook at the same rate as the greens. Also, the texture is really nice. :)
To make this recipe vegan, eliminate sour cream, substitute vegan imitation "cheese" (i.e., like "soy cheese & the like) for Parmesan, & replace 1 Tbsp. butter with 1 Tbsp. extra virgin olive oil, or simply omit butter all together.
Yield: 2 servings.
0 Celebrating Recipe #100 in Style... with a Blog Contest!

It's hard to believe that this blog has almost reached recipe #100. That means I've created & cooked almost one hundred original recipes since this blog's inception back in mid-July of 2007! Can you believe it?!
If you consider that every recipe is first scribbled down, then made from scratch in my test kitchen, taste-tested, sometimes revised, edited, & then posted on this blog, it's not hard to see that a lot of time & effort (as well as love & care) has gone (& still goes!) into the entire process! It also explains why recipes aren't posted in rapid-fire succession; if they were, you can only imagine the weekly grocery bills & the army of people I'd have to invite over to eat all of that food! Hehe.
Our fridge is usually bursting with fresh ingredients as is. It always seems like it's "time to cook" at our place. ;) I couldn't delay the recipe creation process right now even if I wanted to, because otherwise there'd be a whole lot of perishables going bad in the fridge. ;)
Plus, right now, I've got a whole queue of future recipe ideas lined up one after another. My brain is overflowing with ideas, and frankly, it's been a real challenge to keep pace with the recipe-writing output. There's a lot of rapid-fire cooking going on just to keep up with the flying sparks in the brain. ;)
Also, I figure that, at the moment, it's easier to just churn out new recipes every day, because it's actually a multi-purpose activity: With each snack, breakfast, lunch, &/or dinner I create, there's also a new recipe entry for the blog (and/or cookbook!). :) Sure makes the recipe-writing process go a heck of a lot faster when there's a practical purpose behind it all!
Anyhow, I've been doing a lot of thinking lately about how to celebrate reaching recipe 'numero 100.' It's only days away, and so I've decided to hold a contest to commemorate the occasion.
It's quick, easy, & fun to enter the "Cooking with Corey" blog contest!
Write a quick blog post about this contest and link back to this URL somewhere in your article &/or your own website.
Share this post's URL on Facebook (i.e., on your Wall), Twitter, &/or any other major social media platform (i.e., StumbleUpon, Delicious, Technorati, etc.).
Completing the above steps will automatically enter you in a drawing to win one of the following 3 prizes:
Multiple entries are permitted, so, enter as many times as you'd like to increase your chances of winning.
Three (3) final contest winners will be chosen at random, and each of the three winners gets to choose one of the above prizes. All prizes are subject to availability and personal scheduling.
Wednesday, April 21, 2010
0 Recipe #98: Homemade Coconut-Lime Frozen Yoghurt

Ingredients:
2 Tbsp. freshly-squeezed lime juice
2 Tbsp. nonfat milk
2 c. nonfat yoghurt
1" piece ginger (In its whole form, it should fit comfortably into a 1/2 Tbsp. measure.)
1 c. fresh coconut pieces
2 Tbsp. fresh coconut juice (reserved from a fresh coconut)
4 Tbsp. honey
1/2 tsp. vanilla extract
1 pinch salt
1 large frozen banana (optional)
Directions: Pour lime juice, milk, & yoghurt into a small bowl, stir, & then pour mixture into an ice cube tray & freeze for at least 2 hours. If you're going to be using the banana, you'll also want to freeze it at this point as well; just break the banana into two pieces, place it in a small, resealable Ziploc freezer bag, & toss into the freezer for the same amount of time.
IMPORTANT: Do not freeze coconut juice, honey, or vanilla! The flavor of the first two ingredients will be unfavorably altered, and the latter is mostly alcohol, & thus, won't freeze anyhow. ;)
After 2 hours, remove frozen ingredients and let them thaw for about 5-10 minutes. While you're waiting for frozen ingredients to thaw, toss the ginger, coconut pieces, coconut juice, honey, vanilla extract, & pinch of salt into a blender & pulse until coconut has been chopped into small pieces. Do not pulse until smooth at this point, as there's probably not enough liquid to thoroughly blend ingredients together. Add slightly thawed ice cubes, one at a time, pulsing a few times after each addition, and continue to pulse until the mixture is frothy and thick. Add banana, if using. Do not overblend, as you want the mixture to be thick and frothy, not soupy! Serve immediately after blending. (Mixture won't refreeze very well; it'll turn into a solid block of ice, so I strongly recommend only making as much as you & your fellow eating companions can eat in a single sitting.)

Yield: Makes 4 servings.
0 Eureka! I Found It! Er, Sort Of.... :)
Longtime readers might recall from an earlier post that I've been on the hunt for Janet Street Porter's delectable-looking fig pudding recipe. Although I still haven't found the recipe, I found the next best thing -- a video except of the "F Word" episode featuring her "cook-off" with Gordon Ramsey, which shows her making said pudding & also matching wits with Gordon. Enjoy!
Monday, April 19, 2010
2 Recipe #97: Szechuan Stir-Fry

Ginger Garlic Paste Ingredients:
1/2 Tbsp. ginger (about 1" piece of ginger)
2 Tbsp. garlic (about 3 large garlic cloves, peeled & chopped)
1/2 tsp. salt
1 Tbsp. sesame seed oil
Stir-Fry Ingredients:
1 Tbsp. sesame seed oil
3 Tbsp. shallot, chopped (about 1 large shallot)
1/2 Tbsp. rice wine vinegar
1/2 Tbsp. soy sauce
1/8 tsp. red chili pepper flakes
1/2 tsp. five spice powder (Please see this link for recipe.)
1/2 c. baby carrots, sliced crosswise into small rounds
1 1/4 c. (green or yellow) string beans, snapped & chopped into 1" pieces
1 c. zucchini, diced (about 1 small zucchini)
1/4 c. unsalted dry-roasted peanuts
1 c. silken tofu
Raw Ingredients:
1 c. cucumber, diced (about 1/2 medium-sized cucumber)
1 tsp. sesame seeds
2 Tbsp. fresh cilantro, finely chopped
Directions: Pour the ingredients for the ginger garlic paste into a food processor & pulse until ingredients combine to form a smooth paste. (If you don't have a food processor, a mortar & pestle will also work; it just takes a little bit more muscle power. ;) ) Set aside. Next, in a large wok, saute shallot in 1/2 Tbsp. sesame oil on low heat until soft. Stir in rice wine vinegar, soy sauce, red chili pepper flakes, five spice powder, & ginger garlic paste, and then add carrots. Cook for 5 minutes, then add string beans, & cook for another few minutes. Next, add zucchini & peanuts and continue to cook until vegetables have softened slightly but are still firm to the touch. (Vegetables should still retain their crunch, with a consistency similar to that of lightly steamed vegetables.) Remove from heat. Using a slotted serving spoon, transfer contents to a large serving bowl. Next, using the same wok, saute tofu in the remaining 1/2 Tbsp. sesame seed oil, and cook for a few minutes on each side until golden brown. Remove from heat, and transfer contents to the large serving bowl. Add cucumber & cilantro, & gently toss ingredients. Divide into two equal portions, and place onto plates (or into bowls). Sprinkle with sesame seeds and serve.
Serving Suggestions: Serve stir-fry over soba (or chow mein) noodles or with jasmine rice. Also, if you prefer, chicken &/or beef can be substituted for the tofu, or added to it; if you are going to add a mixture of these protein sources, I would recommend using less tofu to accommodate for the other ingredients, so that the portions are appropriately allocated. For a serving size guideline, I'd recommend about 4 oz. of protein per person. (That'd approximately be the size of a deck of cards.)
Yield: 2 servings.
Sunday, April 18, 2010
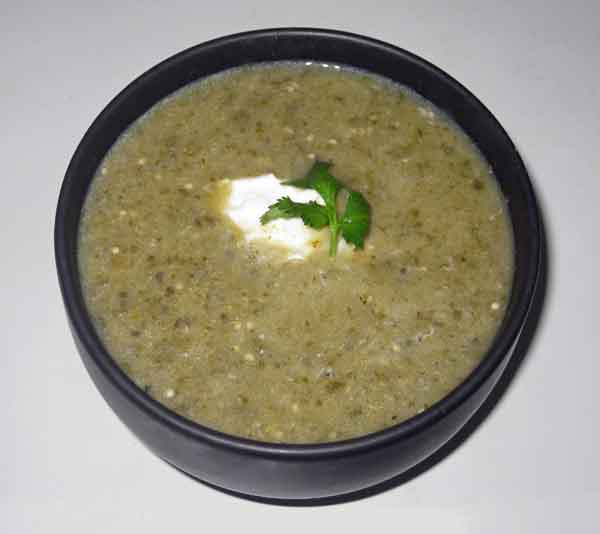
1 Recipe #96: Tomatillo Soup
Tomatillos are part of the nightshade family, and are a close cousin to the tomato. They are very nutritious, containing almost no fat, cholesterol, or sodium, and are rich in iron, magnesium, phosphorus, copper, potassium, manganese, niacin (vitamin B-3), & vitamins A, C & K. They are also very good source of dietary fiber.
This Mexican soup is a tangy treat for the senses! Enjoy!
Ingredients:
1 Tbsp. olive oil
1 c. red onion, chopped (about 1/2 large onion)
3 large garlic cloves, minced
1 large bay leaf
4 c. vegetable stock or water
2 c. tomatillos, husked, washed, & diced (about 6 medium-sized tomatillos)
1/2 jalapeño peppers, finely minced
1/4 c. fresh basil, finely minced
1/2 c. fresh cilantro, finely minced
2 Tbsp. fresh oregano, finely minced (about large 4 sprigs of oregano)
1 tsp. cumin
salt, to taste
ground black pepper, to taste
juice of 1/2 lime
Directions: In a large sauce pot, sauté onion & garlic in olive oil on low heat until soft. While onions are cooking, add bay leaf. Stir on occasion to avoid browning or burning. Next, add vegetable stock (or water), tomatillos, jalapeño, basil, oregano, & cumin. Season with salt & pepper to taste. Simmer soup for about 15-20 minutes. Let cool and add lime juice. Stir soup thoroughly. Remove & discard bay leaf. Pour into blender & pulse until puréed.
Add a dollop of low-fat sour cream (or non-fat yoghurt) to each bowl, garnish with cilantro, and serve with baked corn tortilla chips.
 Chef's Notes: Tomatillos need to be husked and thoroughly washed to remove the sticky coating from their skins.
 Alternate Preparation Ideas: If you prefer, you can skip the puréeing step to serve as a heartier, chunky soup (i.e., similar in texture to a posole). This soup would also taste good with adobe seasoning &/or epazote. Other possible toppings include melted, shredded low-fat Monterey Jack or cheddar, diced cucumber, &/or avocado.
Yield: Serves 3-4.

Saturday, April 17, 2010
0 Recipe #95: Pomegranate Mojito
A friend recently asked me if I had a recipe for a pomegranate mojito. I told her that even though I didn't know of a recipe off the top of my head that I could probably come up with one and post it on my blog. :)
Since Erik was going to be stopping by the grocery store after work that night anyhow, I asked him to add some POM, a pomegranate, & some limes to the shopping list.....
So, here's the recipe I came up with, which I'd like to dedicate in honor of my friend. :) Of course, I taste-tested it for recipe-posting purposes, and am happy to say that it turned out rather well! Hope that both you and my friend will enjoy it! Cheers!
Pomegranate Mojito

crushed ice
6 Tbsp. pomegranate juice
2 tsp. pomegranate seeds
1 Tbsp. white rum
4 Tbsp. chilled club soda
Directions: In a tall cocktail glass, combine lime juice, honey, and mint leaves, & smash together with a pestle or the back of a spoon. Fill glass half-full with crushed ice, and then pour in pomegranate juice & seeds, rum, & club soda. Stir together well with a spoon, garnish with a sprig of mint &/or a lime wedge, & serve.
Alternate Method: Crush mint with a spoon at the bottom of a tall cocktail glass. In a cocktail shaker, combine all ingredients except the mint, shake well, & strain pomegranate mixture into the glass. Stir well & serve.
To make this drink non-alcoholic, just serve without the rum, substituting another tablespoon of club soda for the rum. It still tastes really good!
Yield: Serves 1.
Thursday, April 15, 2010
0 Let's Play "Cook Around the World"

My motto is, "Life is short, so why only eat hamburgers or mac & cheese?" ;) (Or alternatively, as I wrote in one of my Yelp reviews, "Life is too short to consume bad food & drink." Either one pretty much sums up my attitude about food. :) )
Sometimes I write a recipe because it's an old favorite I'd like to share, and other times I cook and write recipes to explore. While I've both tasted & cooked a wide variety of cuisines, there are also some dishes I cook precisely because I've never made or tasted them before.
You can blame it on my curious and often impatient Gemini nature; I can barely stand in one place for too long, let alone cook the same thing in the same week or even in the same month. There has to be something new to catch my fancy. I require constant newness and excitement. :)
Also, there has to be a challenge in it somewhere, or I'm just not gonna hang around for very long. By the time I've cooked one thing or mastered a new technique, I'm already moving on to something new. For me, it's all about continual learning and improvement. If the mind isn't being stimulated in some way, I find it hard to stay interested. It's not necessarily that I get bored easily but rather that I can't stand making something if there's no progression or lesson in it somewhere. Translation: I don't retread old ground. Been there, done that; time to move on & do something new.
By the same token, I don't do ordinary. :) But that's probably already patently obvious from the recipes displayed on this blog.

Actually, I did have a spicy black bean burger the other night for dinner, but I'm sure that technically doesn't count in his mind. :) If you're going by the strictest definition, burger = actual meat products. Haha.
The thing is if I'm going to list a hamburger recipe on this blog, it's not going to be comprised of just "meat and some seasoning." :) It's going to be a gourmet hamburger with fresh herbs and spices, and a little something extra to captivate one's interest; there has to be a special little twist somewhere in the recipe; otherwise, why post something here that's already been done before?! I gotta stay true to my promise of "100% original recipes," right?! :) Anyhow, creativity is all about the new and the original.
Some people might think that that's being a tad masochistic or extreme, but I'd disagree. To me, it's worth it to put in the effort and eat something fresh and tasty. Moreover, it's healthier.

However, lately I've been feeling excited once more about cooking, so I'm gonna go with it, that is, until I run out of steam and start making boiled eggs again for dinner. :) I'm gonna ride this wave of inspiration for all it's worth!
I'm sure there are a lot of people who probably think I'm insane for eating & cooking this way, (no, scratch that, actually, I know this, because there are people who've already expressed this to me!), but let me say it again: I'm gonna do my own thing, and they can do theirs. :)
And, as I said before, I don't really think I'm all that extreme. It's not like I'm advocating that people go on some nutty meal plan where they only eat grapefruits & eggs all day, or go on one of those all-protein or all-carb diets. Now those people are insane, not me. :)
.jpg)
While I don't need external validation to reinforce my point of view, it's nice to know that there are others who get what I'm trying to do here and also on my running blog. I've never hidden the fact that I'm here to push the envelope and introduce new ideas, not to keep doing the same boring thing over and over again until I & everyone else around me wants to scream. Dogs chase their tail around in circles, not humans. :)
Comfort zones aren't locked into place; at one point, those foods and behaviors that we now call our "comfort zone" were once new to us. They only became that way over time, because we allowed them to enter our circle of contentment. As I get older, I notice that this circle has grown larger, not smaller. I have learned to accept more new things into my life, not less. I realize that this probably goes against the "aging stereotype," but I'm OK with that. My sister and I used to joke that we'd be the sort of grannies who'd be hotrodding around in red Porsche 911's at age 80. :) I don't plan to start acting "old" as I get older, nor do I plan to make the same meal every Tuesday. No thanks. Think I'll stick to the current menu -- variety & excitement, done with a youthful outlook & a unique style that's all my own. :)
Another reason why the recipes on this blog are so diverse is that, as I write my cookbook, I'm consciously thinking about how to set my cookbook apart from all of the other cookbooks already out on the market. I figure that if I can provide recipes that are not only original and unique, but also showcase some of the "less commonly known" dishes, that this cookbook will truly present something new to its readership.
 This is also why I'm attempting to include as many different regional and (inter)national cuisines as possible, both here on this blog and in the cookbook I am currently writing.
While I generally try to write recipes which are amenable to the average American palate, I do realize that sometimes some of these recipes and/or cuisines might not always be familiar or accessible to some. If you haven't realized by now, that's actually the point. :) I want people to discover new and unfamiliar things here, and to get excited about making & eating something that they might not have tried before. This blog serves as both a recipe respository, and as an introduction to cuisines of different lands and cultures.
I'll admit it, there are also times when I don't necessarily want to think about whether or not the recipes I create are accessible. I don't want to do the mundane or the expected; I want to be daring and go off the deep end. I want to create novel and unusual recipes that I want to eat, even if nobody else does. :) Maybe there will be a few brave souls that will come along with me for the adventure, but if not, I'm honestly not too worried about it. It'd be impossible to please everybody, so I'm not going to even try. Regardless, playing it safe isn't an option. :)
Sometimes, I've got a basic outline for a recipe -- i.e., ideas I've scratched out on paper before I enter the kitchen, a general list of possible, future recipe ideas, or a list of recipe requests that are generated by way of the various recipe challenges I've posted on this blog, etc. -- but most of the time I'm just winging it. The more spontaneous the better. :)